Installation Basics
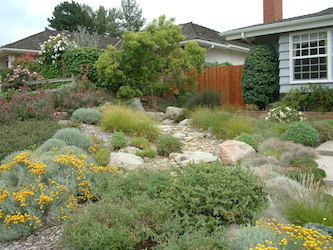
Introduction: You can do this. Converting turf to garden space is a creative project that should engage you like any other home remodel project. You will get some exercise and you need to learn a few new things about landscaping. Here is a list of some basic things you need to know about each step of the process. This advice is in no way exhaustive but will focus on the essentials and the problem areas. Since we are talking about turf replacement and not necessarily re-landscaping the whole yard we will confine our comments to landscaping the space the lawn currently occupies. You can do this.
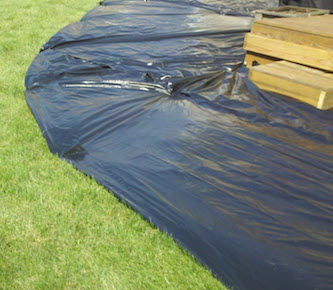
Putting the Lawn Down: Since most lawns are crazy mixes of many different types of grass (Bermuda, kukuya, blue grass, rye, fescue etc.) chances are your lawn area has some grass types that propagate by runners which are small segmental stems that can reproduce easily. Bermuda is the notorious example of a runner type grass. It is always best to kill the grass before removing it. If not, you will have the grass growing back up through your new plantings, creating a maintenance nightmare. It is not absolutely necessary to put the lawn down but it is strongly desirable to start this way. Here is a link describing some methods of execution.
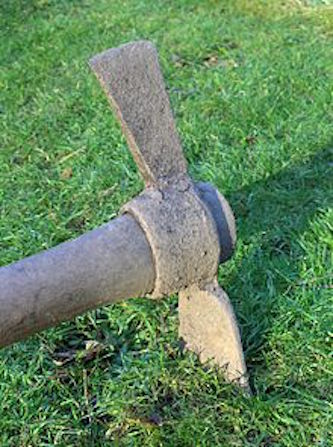
Pulling the Old Lawn Out: After the lawn is dead, how do you remove it? This is where the exercise starts. You could chip it out with a mattock (great tool for this job https://en.wikipedia.org/wiki/Mattock). You can dig it out with a shovel (tends to pick up more soil than is needed.) You can rototill the space and rake up the dead grass. You could rent a sod cutter (your local rental yard will have both rototillers and sod cutters but it will take a little skill and courage to use it). You could also hire a local gardening company to remove it for you and dispose of it to make this step of the process go quickly. This might sound like cheating for a do-it-yourselfer but if you can afford it, you will be grateful for the help. This is the one step in the process where a team of helpers is desirable.
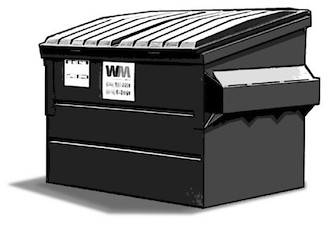
Disposing of the Old Lawn: There are several ways to accomplish this task. If it is a small to medium sized lawn that has been pulled out, you could make a pile on the driveway or side yard and incrementally fill your green waste recycling bin over a couple of weeks. Solicit empty or near empty recycling bins from your neighbors to speed up the process. If the size of the lawn removed is large enough, you might need to rent a dumpster which you will need to fill up yourself. (To locate companies who will bring one of these to you and take them away when full, simply search the Internet for dumpsters and your city name or check the Yellow Pages.)
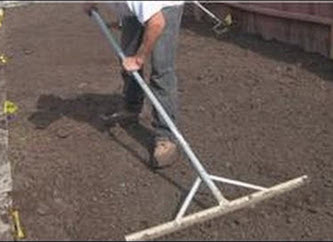
Grading: Most lawn areas are somewhat level. After you remove the turf you have the option to keep the area flat or contour it. Using a steel rake you can move soil around to create mounding and drainage swales. It helps to create mini catch basin areas where rain water can gather and soak into the earth rather than run off into the gutter and storm drains. Make your mounds and swales subtle and natural for the best results. If you are going to use the old lawn areas as a mini-meadow rather than grade softly or if you plan to use larger plants, consider more dramatic mounds to feature plants and to provide dimension.
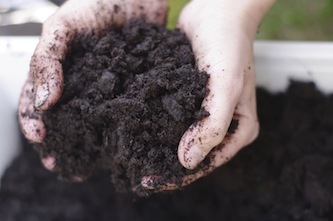
Soil Prep: We need to create a good growing medium for the new planting. Adding a generous amount of soil amendment to our native soils is almost always a good idea and will stimulate and support plant growth. Add 2 inches or more of decomposed mulch (many times it will just be called Garden Soil at the nursery) and work it in thoroughly with a four pronged garden cultivator or rototiller. Once you have completed this task, re-grade a second time with a steel fork to maintain your grading shape.
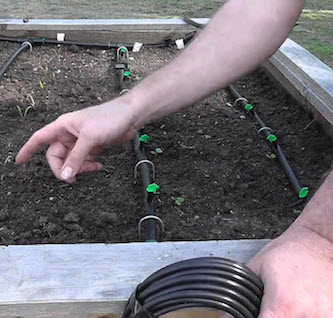
Irrigation: You might have an irrigation system in place for the old lawn which you can reuse. Run it to see if it works and if there are any leaks. If possible, switch spray heads to rotor sprinkler heads for more efficient watering. Drip irrigation is another way to go; it is the most water efficient. Most home improvement supermarkets and garden centers have employees who can direct you to the right equipment you will need for the task. Explain what you are doing and ask for advice. Don't be shy; if they aren't helpful, go to their competitor to get proper help.
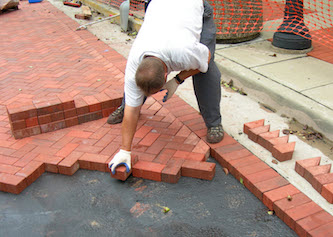
Hardscape: If you plan to put a walkway through this garden space or add a sitting area, patio, trellis or benches, now is the time to install these items. Hardscape elements (non-plant aspects of a landscape) need a good foundation. If they don't have a good foundation, they will shift, move, crack or break. Remember that you are going to add a couple of inches of mulch at the very end of the planting process so make sure you take this into account when installing your patio area or stepping stones.
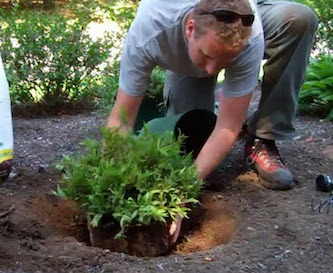
Planting: Here are a few suggestions about planting. The smaller the plants you buy, the less digging you will have to do. Plants will grow quickly to the size you want so don't be afraid to start small. For ground cover, ask the nursery employee about the spacing needed for the variety you choose. Plants that are grown in flats (a low large square ground cover container) can be planted rather closely together to speed up the process of filling in if you so desire. Low prostrate growing plants that come in one gallon containers need to be properly spaced out so that they don't pile up on each other. Again, ask for spacing advice. For non ground cover varieties, make sure to dig a hole one and half times the size of the pot depth and two times as wide. Add a healthy amount of soil amendment to the soil you excavate and work it in before back filling. With the excess soil you create, make a subtle berm around the plant that will catch water and direct it to the roots. Fill those basins with water frequently after planting for a couple of weeks. Remember that at the nursery, those pots were watered constantly and a new plant needs to set down roots before it can be weaned from frequent waterings.
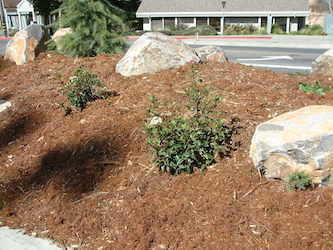
Mulch: In all the spaces around the plants you have put in the ground, you should mulch. It is important that you use a heavily decomposed mulch and not wood chips and the like. Wood chips will actually require nutrients from the soil to break down rather than provide new nutrients in the short term. Put down a sufficient amount of mulch to hold water in and away from the evaporation of the sun, and to suppress weed growth by depriving seedlings of much needed sunlight. If your plantings are primarily 1,5, 15 gallon plants, you can mulch a couple of inches deep. If you planted from flats you might need to do a light sprinkling of mulch in the open spaces and allow the ground cover to grow up and over the mulched areas.
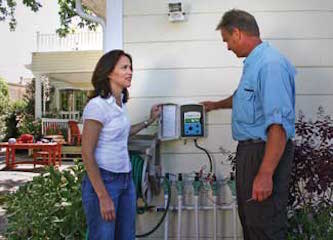
Setting and Managing the Controller: This is where the heart of the water savings story begins and ends. You must pay attention to your controller and how it is set. Your new plants will need frequent waterings at first, perhaps every other day, for a couple of weeks while they set down roots. Then you can begin backing off. Since you are designing a water efficient space, you will be irrigating far less than a turf area eventually. The most frequent mistake in this process is to think you can put new plants in the ground and neglect to water them in the first month. Use an online water calculator to set your irrigation correctly, a month or two after planting. Use common sense and watch the plants; if you pay attention they will reveal to you what they need.